One of the main advantage of gRPC over REST API’s is that gRPC supports streaming methods in addition to the traditional request-response style. There are 3 kinds of streaming support in gRPC namely Client Streaming, Server Streaming and Duplex (bi-directional streaming). In this post we talk about ClientStreaming and how to implement it in C#/.NET
What is ClientStreaming
In Client streaming calls the client sends an initial request to the server and gets back a stream to write a sequence of messages to. The client writes to the stream until it is finished and closes the stream. After which, the server responds with a final message containing the status code, status message, and optionally, some metadata in the Trailer/Header. Similar to server streaming, gRPC guarantees the order of messages that is written to the request stream.
A definition of a client streaming method is shown below. Note the use of the keyword stream in the request.
rpc SendNotifications(stream NotificationsRequest) returns (NotificationsResponse); So why would you use ClientStreaming instead of just making a sequence of Unary calls? Well, writing to a stream is generally faster than making a new rpc each time. That said, streaming adds complexity in the implementation especially around the handling of error scenarios. For example, you’d need to handle in the your code what should happen when the connection is interrupted in the middle of a stream.
Implementation
To create a gRPC project follow the steps in Your First gRPC Project. By default, dotnet creates a greet.proto file which contains the service definition of the generated GreeterService. Let’s edit this file and replace its content with the proto file below
syntax = "proto3";
import "google/protobuf/timestamp.proto";
option csharp_namespace = "ClientStreaming";

package greet;


service Greeter {
   rpc SendNotifications(stream NotificationsRequest) returns (NotificationsResponse);
}


// The request message containing the user's name.
message NotificationsRequest {
  string message = 1;
  string to = 2;
}


message NotificationsResponse{
  string message = 1;
  int32 total = 2;
  google.protobuf.Timestamp receivedAt = 3;
}
Build the project/solution to ensure that everything is correct. Now, open up GreeterService.cs and add the implementation of the SendNotifications method. Note that the 1st parameter of the method is an IAsyncStreamReader<T>. This is what client applications use to write to the request stream.
using ClientStreaming;

using Google.Protobuf.WellKnownTypes;

using Grpc.Core;

namespace ClientStreaming.Services;
public class GreeterService : Greeter.GreeterBase {
    private readonly ILogger<GreeterService> _logger;
    public GreeterService(ILogger<GreeterService> logger) {
        _logger = logger;
    }

    public override async  Task<NotificationsResponse> SendNotifications(IAsyncStreamReader<NotificationsRequest> requestStream, ServerCallContext context) {
        int total = 0;

        List<NotificationsRequest> messages = new();
        while (await requestStream.MoveNext()) {
            var request = requestStream.Current;
            messages.Add(request);
            Console.WriteLine($"Message \"{request.Message}\" sent to {request.To}");
        }

        var recipients = messages.Select(c => c.To).Distinct().ToList();
        return new NotificationsResponse() {
            Message = $"{string.Join(",", recipients)} received messages",
            ReceivedAt = Timestamp.FromDateTimeOffset( DateTimeOffset.UtcNow ),
            Total = total
        };
    }
}
Hit F5 to run the project and take note of the port where it is running
Test the method
Now that the service is running, let’s fire up FintX (https://github.com/namigop/FintX) to verify that the service is working fine. FintX is an open-source, native, and cross-platform gRPC client. I’m on a Windows, so I have installed the Windows package (MacOS and Linux downloads are also available)
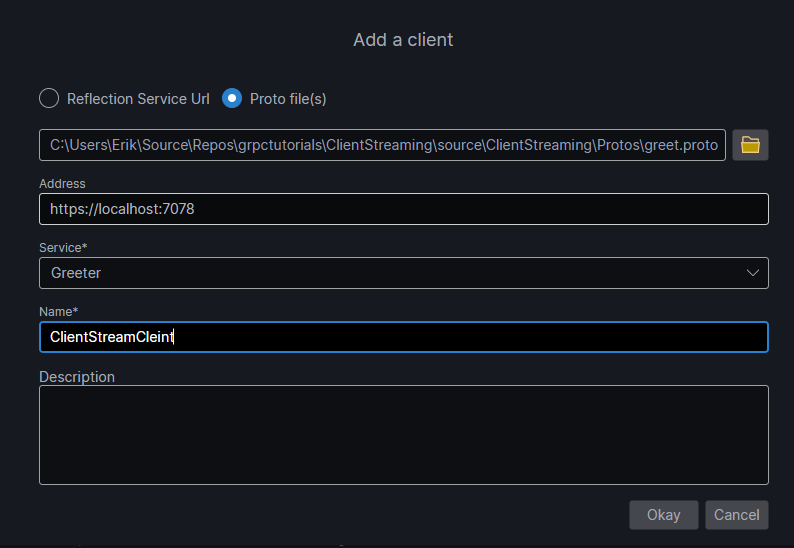
Click on the plus icon to add a client. The value entered in the http address should match the running service

Click Okay and then double-click on the SendNotifications method to open it in a new tab.

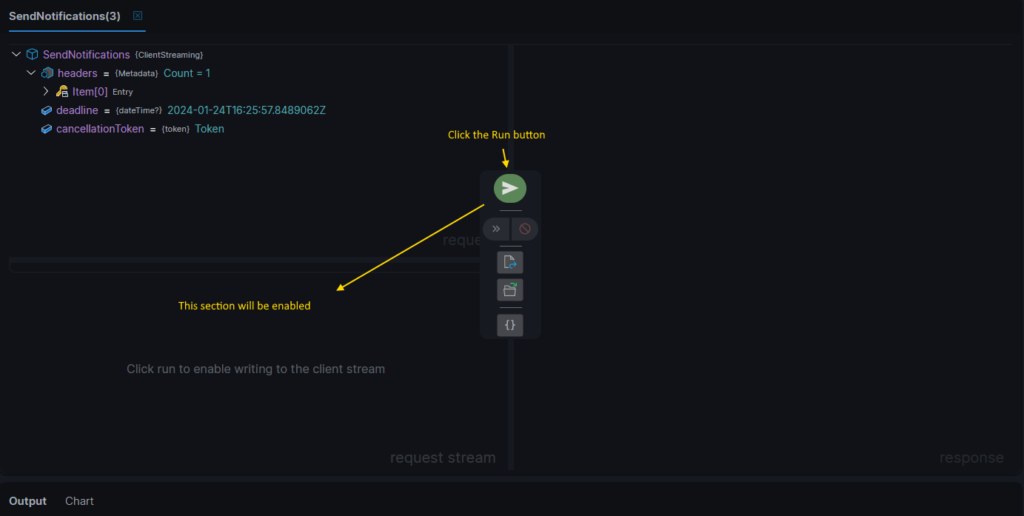
Click the Run button. If the response from the server is successful, the request stream panel will be enabled.

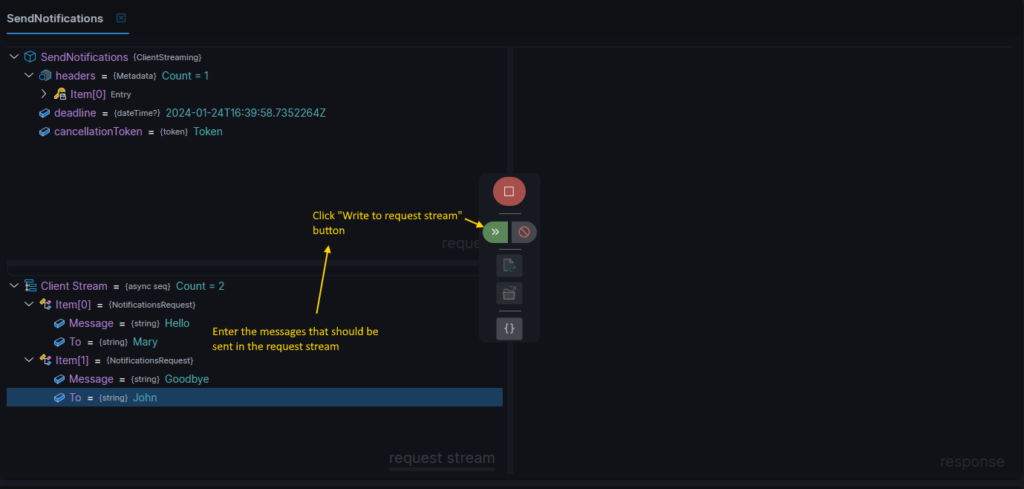
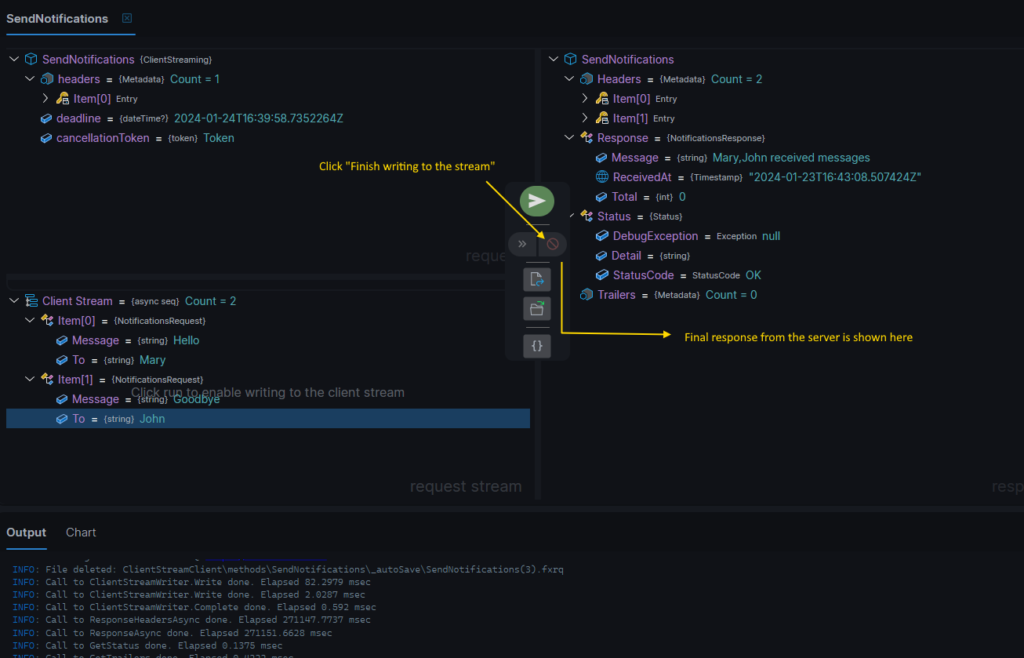
Enter the values to the request stream then click on the “Write to request stream” button. Write as many messages to the request stream as you want. Once finished, click on the “Finish writing to the request stream” button. The server responds with the final message (shown below).

Others
The full source code of this tutorial can be downloaded from https://github.com/namigop/grpctutorials/tree/main/ClientStreaming. Happy coding!